
Convert Gerber to Extended Gerber
Convert RS-274D to RS-274X
GerbView can convert all your older Gerber files to the new extended Gerber format, also known as RS-274X.
For this conversion to work successfully you will need to do the following steps:
Step 1:
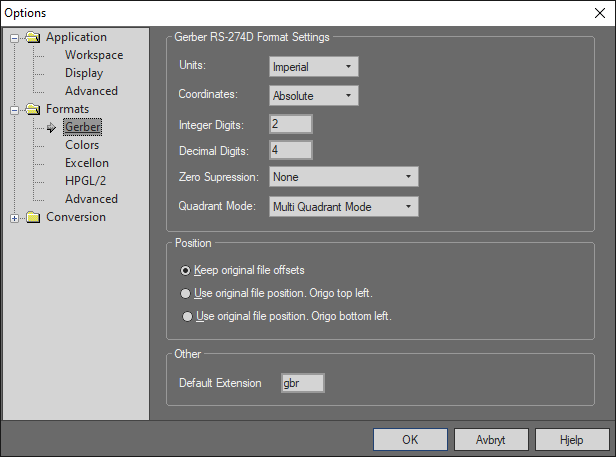
Older Gerber files do not include any information regarding units, apertures or coordinates.
Because of this the first you will need to do, is to make sure that the Gerber format settings are correct.
Open the Application Options dialog found in the Settings tab and locate the Gerber section, under the Formats category.
Here you can set the units (metric or inches), whether the coordinates are absolute or incremental, number digits and how zeros are to be treated.
All this information should be available from the system that created the Gerber files, usually in a text file.
Here is a picture of this dialog with the default Gerber settings:
Step 2:
After you've checked that the format settings are correct you can now load all the Gerber layers using the Add Layer command, found in the Home tab:
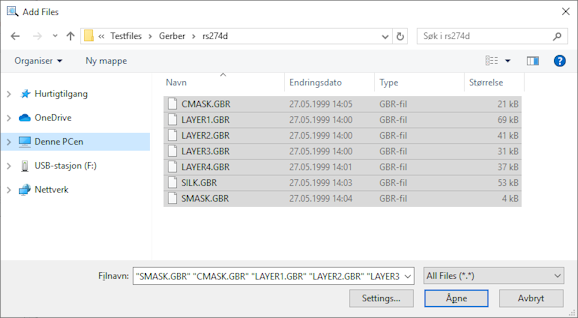
You should now load the aperture table using the Load Table command. GerbView support most aperture file formats, but if GerbView cannot load it you will need to manually set the aperture settings. Open the aperture editor using the Edit Table command found in the Tools tab and do the necessary changes.
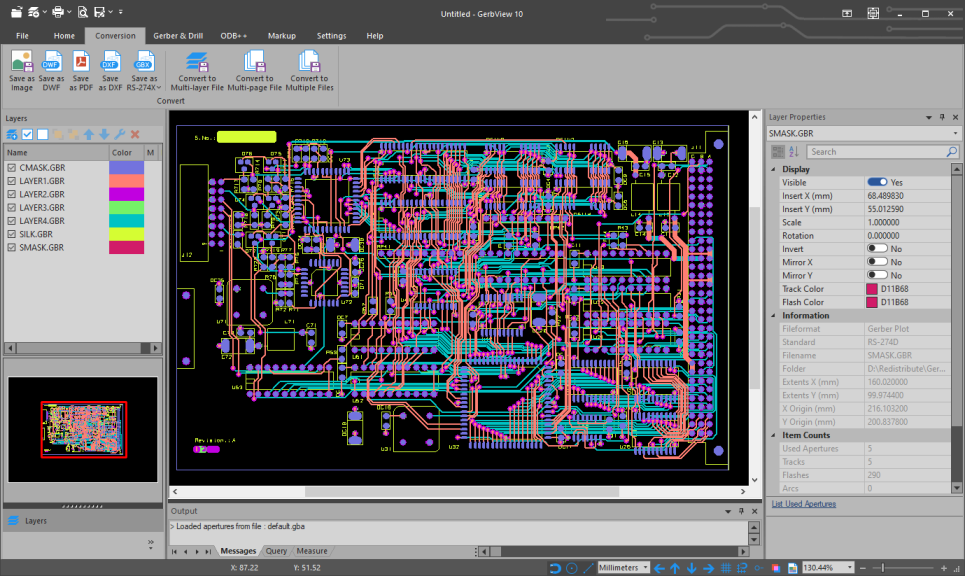
When all the required layers and an aperture file have been loaded, you can visually check that everything looks ok:
Step 3:
Then we can finally start the actual conversion.
Locate the tool named Convert to Multiple Files in the Conversion tab, and select it.
A dialog will then appear where you can select the layers you want to convert.
Select Gerber RS-274X as output format and select an output folder.
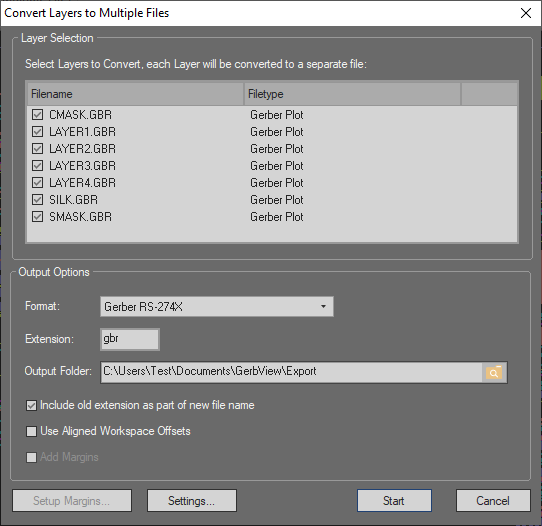
When you're satisfied with the settings just press Start and the new extended Gerber files will be created in the output folder.


